This guest post is by Ryan of VIRTUBYTES where you can find his back catalog of posts. Ryan writes about VMware products and a lot of related infrastructure technologies.
A few weeks back, we discussed Zerto’s ability to perform point-in-time file level restores directly from the replication journal. However, what if the data you need from 30 minutes ago isn’t readily compiled into a file or requires manual intervention to produce; such as a database backup or a PST export of Exchange mailbox items? Introducing Zerto Failover Tests for data recovery.
A Zerto Failover Test has the ability to spin up a virtual machine from a specific point-in-time to an isolated network. From there, data can be manually compiled and exported.
Although the failover test process is more step intensive than a File Restore, it still addresses a vital need for many organizations; having that ability to restore application data from a specific moment. When compared to traditional backups, the ability to restore data seconds before corruption or loss is critical.
In this walkthrough, we will focus on a database backup and recovery. To do so, we will perform a failover test to an isolated network, backup the database, and finally, extract the SQL database to our production location. As this particular test network is completely isolated, we will be using VMware PowerCLI to extract the backup file.
Initiate Failover Test
Log into the ZVM and navigate to the Failover actions in the bottom pane. Ensure the Failover toggle is in the Test position and click Failover.

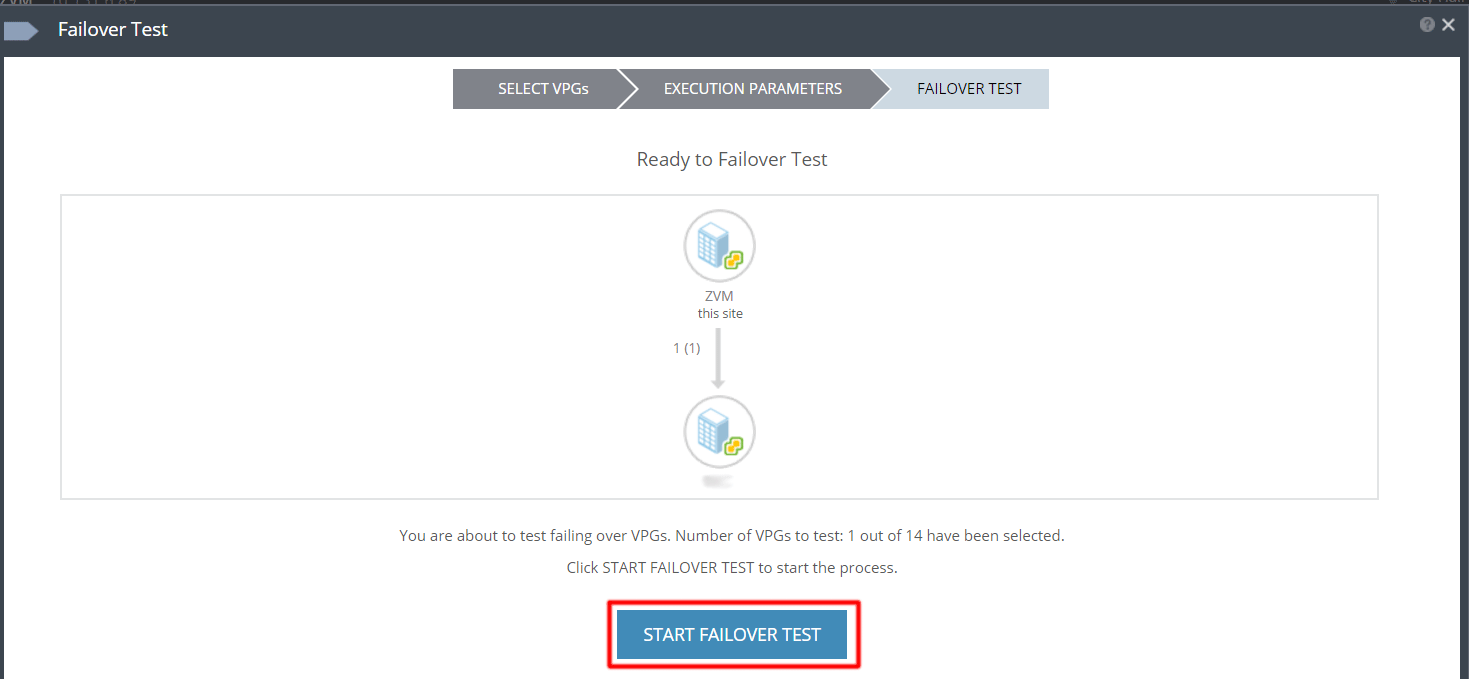
The Failover Test wizard will now begin. Select the appropriate VPG where the database resides.

Select the desired execution parameters for the VPG. For this test, we will set the pertinent Checkpoint to the required point in time.

Lastly, click Start Failover Test to begin the process.
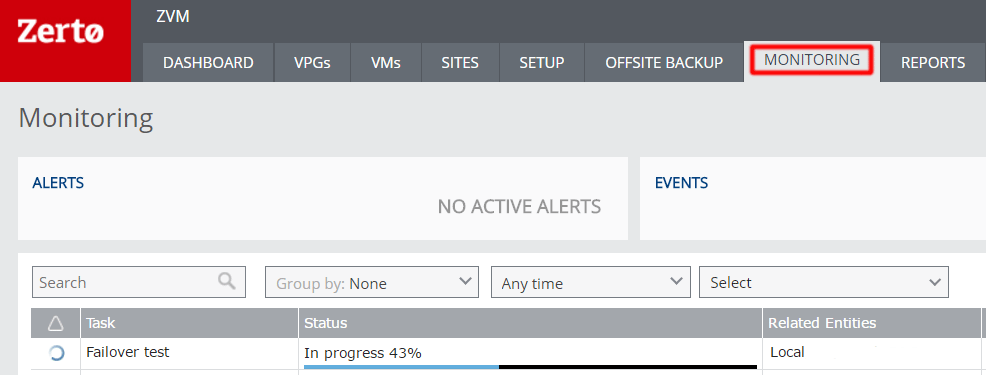
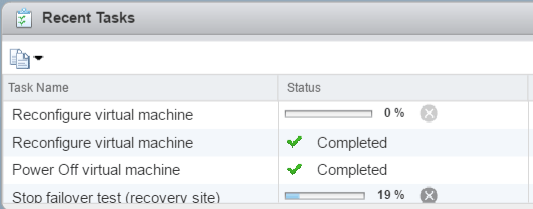
Monitor the test failover initiation from the ZVM Monitoring tab or vCenter’s Recent Tasks.
The test failover initiation will:
- Register the vm at the recovery site.
- Create a temporary scratch VMDK for changes made to the test vm.
- Connect the vm to the specified test network.
- Boot the vm for testing.
- Leave the production vm powered on and continue replicating changes.
Backup Database
As mentioned previously, this test failover is set up on an isolated network. Therefore, we will need to access the vm from the virtual machine console in vCenter.
To begin, log into the recovery side vCenter and locate the test vm. It will be registered in the format of vmname-testing recovery.
![]()
Select the Open Virtual Machine Console icon to access the vm.
![]()
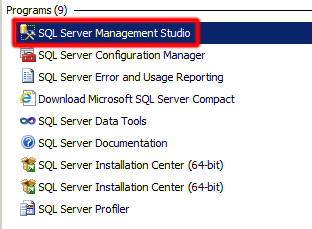
Once the console has opened, log into the machine with the appropriate credentials. Next, navigate to SQL Server Management Studio and connect to the database server.
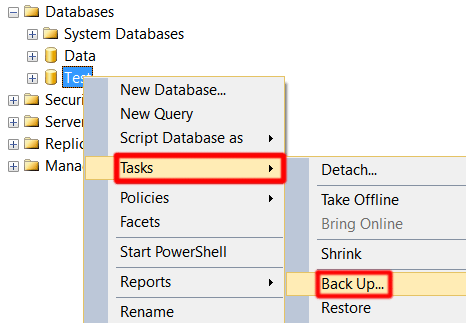
Once connected, browse to the specific database in the left pane of Management Studio. Right-click the database and under Tasks select Backup…
Next, configure the save location and options for the database backup. In this instance, the backup type is Full and Destination location for the backup is in a temp directory. If you would like to change the directory, remove the existing location and add a new location.
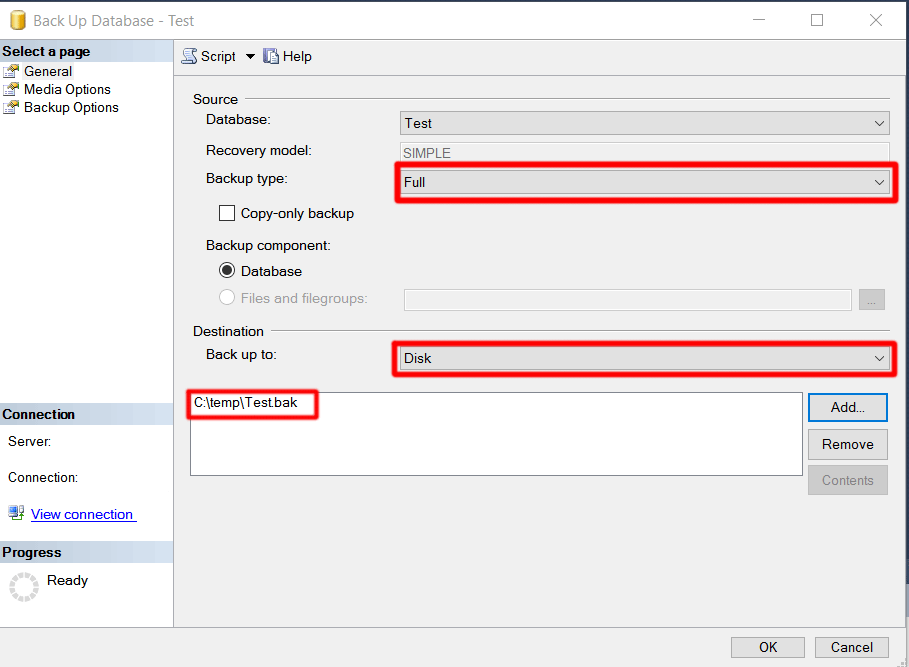
To finish, set the Media and Backup options as desired. Click Ok to start the backup.
The below message appears after a successful backup.

Extract Database Backup
Now that we have a backup of our database, we can extract the file from the isolated vm utilizing VMware PowerCLI; specifically, the Copy-VMGuestFilecmdlet. The Copy-VMGuestFile cmdlet enables administrators to copy a file to or from the guest OS of a vm using VMware Tools.
Connect to the recovery side vCenter through using the Connect-VIServercmdlet. Check out this VMware article on the basics of connecting to vCenter.
C:\PS>Connect-VIServer -Server vcenter01 -User admin -Password pass
For our example, we will copy the .bak file from the test virtual machine to a folder on our local drive.
Copy-VMGuestFile -Source c:\Temp\Test.bak -Destination c:\temp\ -VM ‘testVM – testing recovery’ -GuestToLocal -GuestUser domain\user -GuestPassword password
![]()
With the backup extracted, restore the database as needed.
Stop Failover Test
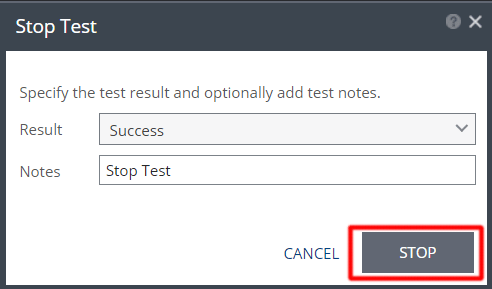
Once you have completed the extraction, navigate back the ZVM. Go to Tasks from the Monitoring tab and press Stop on the failover task.

The Stop Test window will appear and allow you to enter the Result and applicable Notes. Select Stop to stop the Test.
Zerto will now begin the stop tasks. The teardown process will:
- Remove failover test vm from recovery inventory.
- Delete scratch VMDKs used for testing.
- Keep replicated changes made in production during the failover test.
That’s it! We’ve now been able to grab a database backup seconds before data corruption occurred.
NOTE – During the failover test, all IO writes are written to the scratch volume. To ensure the volume does not fill up and cause associated issues, limit the duration of the failover test.